
It seems like every day one of my friends is announcing they are pregnant on facebook in some unique way. There are ideas all over Pinterest, Etsy and Google advertising cute ways to announce you are pregnant. However, we all want ours to be unique and to fit our personalities, right? Take in all the ideas and think about who you are and what fits you best.
You will first need to decide when you want to make the announcement. We waited until about 16 weeks, so we were safely passed the 1st trimester, had two ultrasounds and baby was healthy. Make the announcement when you feel comfortable in your pregnancy to do so, as you will hear many more times throughout your pregnancy- every pregnancy is different.
Our announcement included “And so our greatest adventure begins….”. It fit us perfectly as of all the travels, experiences and memories we have had this is sure to be our greatest adventure together. Then I tied in LOVE, creating two t-shirts, LO for my husband and VE for me. I opted several times throughout pregnancy to do some do it yourself (DIY) work as these shirts and props get expensive! Once you have the basic supplies it makes it easy to create more.

Think of a good hashtag, so you can use it in with all your pregnancy photos to remember your journey later on.
Items needed for DIY
- Computer/ Printer to print design
- Pencil for tracing
- Freezer Paper (can be found at Walmart)
- X-acto knife (can be found on Amazon)
- Iron/ Ironing board
- Fabric Paint
- Foam brushes
- T-shirts (used my husbands older white under shirts instead of buying new ones)
- Piece of cardboard
Don’t worry too much if you aren’t that artistic, I definitely had some minor flaws in my final product but they were not noticeable in a picture.
Steps to create LOVE t-shirt
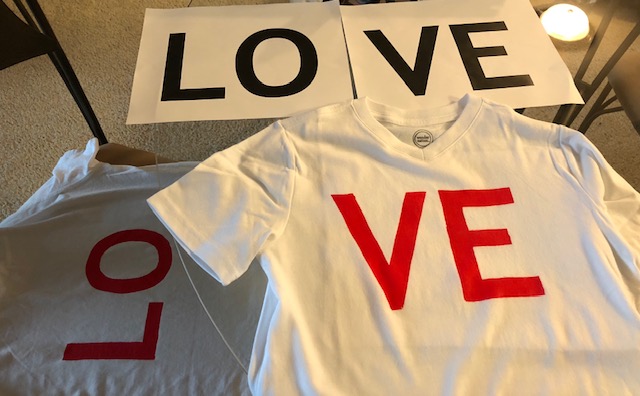
1.) Type LOVE in Microsoft Word and print in landscape format. I chose a very large chunky block lettering to make tracing easier.
2.) Put piece of freezer paper over the printed pages and trace the word. While doing this turn your iron on.
3.) Place a flat piece of cardboard (I cut mine out from an old box) behind the freezer paper.
4.) Use an X-acto knife to carefully cut the traced word out. Be careful as that knife is sharp!
5.) Put the letters aside and use the outline of the letters to iron onto the shirt. You will use this as a stencil to then paint inside. For the word LOVE, you will need to also iron on the inner circle of the O.
Tip: Before ironing make sure you know where you would like to iron the letters onto each shirt. Since my husband is taller than me, I needed to drop his letters on his shirt and raise mine up a little. They were not placed in the same location on both shirts as I wanted them to be in a straight line when standing next to one another.
6.) Place the piece of cardboard (or ironing board) between the front and back of the shirt and begin ironing on the freezer paper stencil. Be careful while doing this, as freezer paper is thin. Once the stencil of LO is ironed on securely, add the inner part of the O and carefully iron this on too.
7.) Repeat step 6 for the second shirt (VE) and beware of my tip above for placement. Make sure to iron all edges near the letters as we will be painting over these.
8.) Once both shirts have their stencils ironed on, it is time to paint! Pour some paint onto a disposable paper plate and use a foam brush to slowly paint inside the stencil. While painting keep the piece of cardboard between the front and back of shirt to prevent any paint seeping through the front of the shirt to the back. Repeat this step for each shirt.
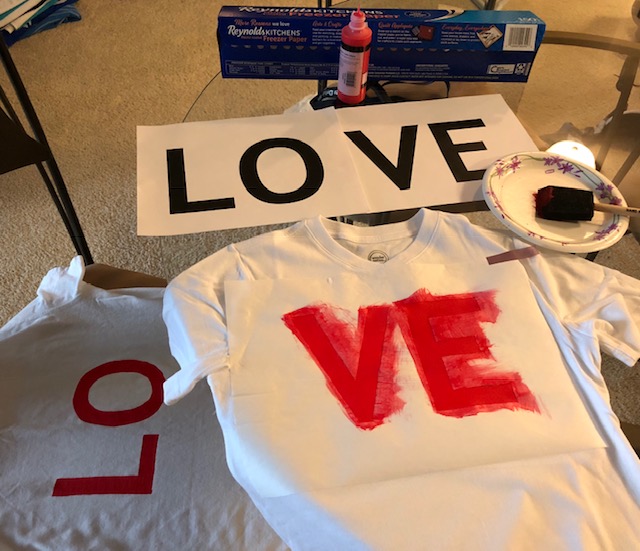
9.) Check shirt throughout the next 15-20 minutes and if the color is too light than add another coat of paint to each shirt.
10.) Once the paint is dry, slowly peel back the freezer paper to reveal your fabulous new DIY shirts!
For our announcement we held up a onesie that said “And so our greatest adventure begins….. Baby K arriving January 2019”
Good luck on your announcement, it will be great!